Forms
Forms are Python scripts that allow for user interaction.
With a Form, you can collect user input and use Python code to work with that information however you need. Some examples are making calculations, generating documents and graphs, and sending it via Requests.
They are coded with Abstra's UI-generating lib and created like terminal programs. Each command from the lib you add to your code - read email, read_file, display_image, etc. - will appear as a widget in your form.
Build with widgets
A widget is a read or display function.
Add them to your code to create functionality. Use read widgets to get user inputs, and display widgets to show information to the user on the screen.
Here is an example of a form's UI and the code it was built with:
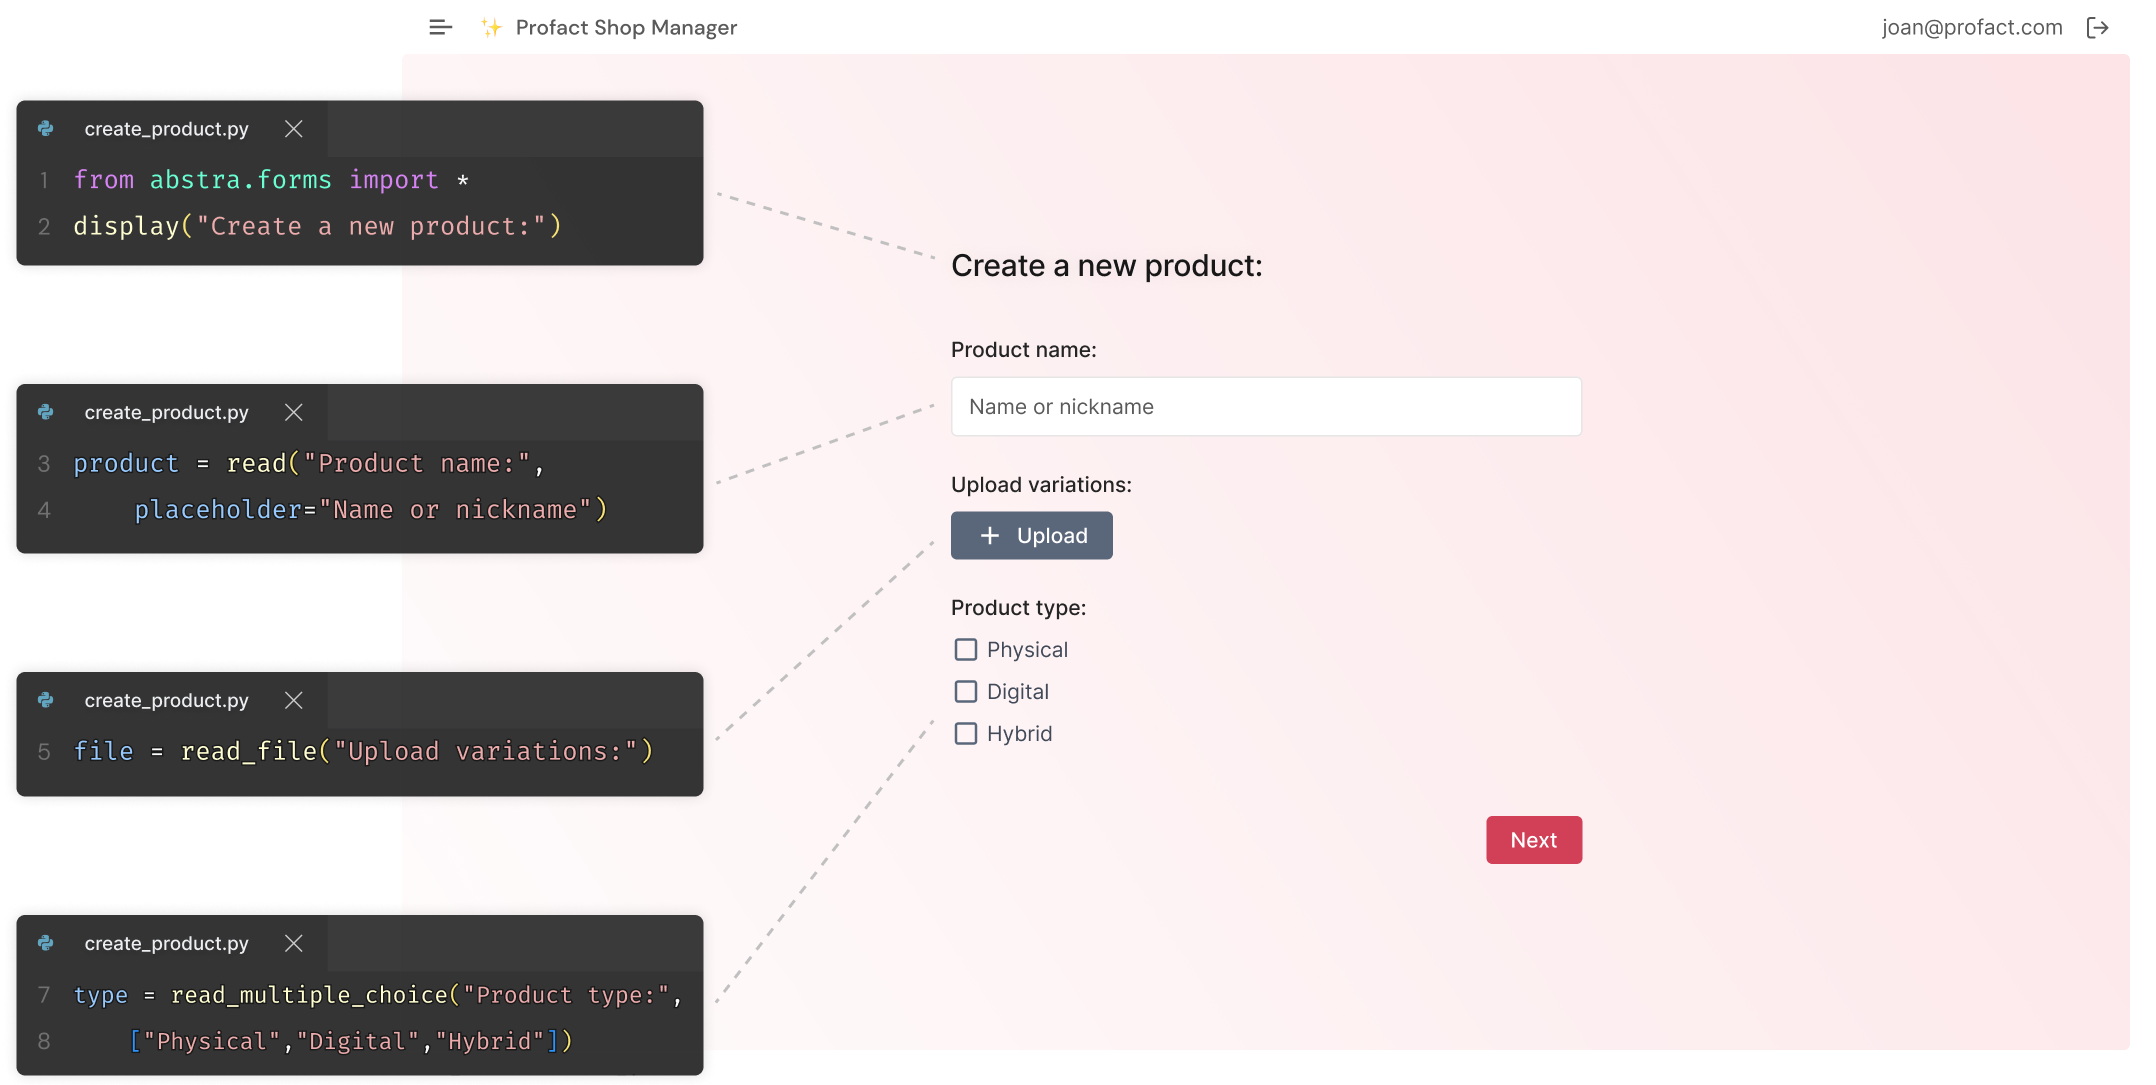
There are 40+ types of widgets you can use, all with out-of-box validation. See the complete list of widgets here.
Your Form = a Python script
A Form is as powerful as a Python script can be.
The data accessed and collected through Forms can be manipulated with native Python and with any desired Python libraries.
Bring in new information from an API with Requests, organize and clean data with Pandas, calculate with Numpy, create graphs with Matplotlib and Plotly, and much more.
Simply import any library you have installed locally and add it to your project's requirements.
Form's settings
The Settings tab is where you will edit welcome and end screens, messages and alerts that appear to the user while they're filling out your form. All the actual Form content and logic will be handled in your code.
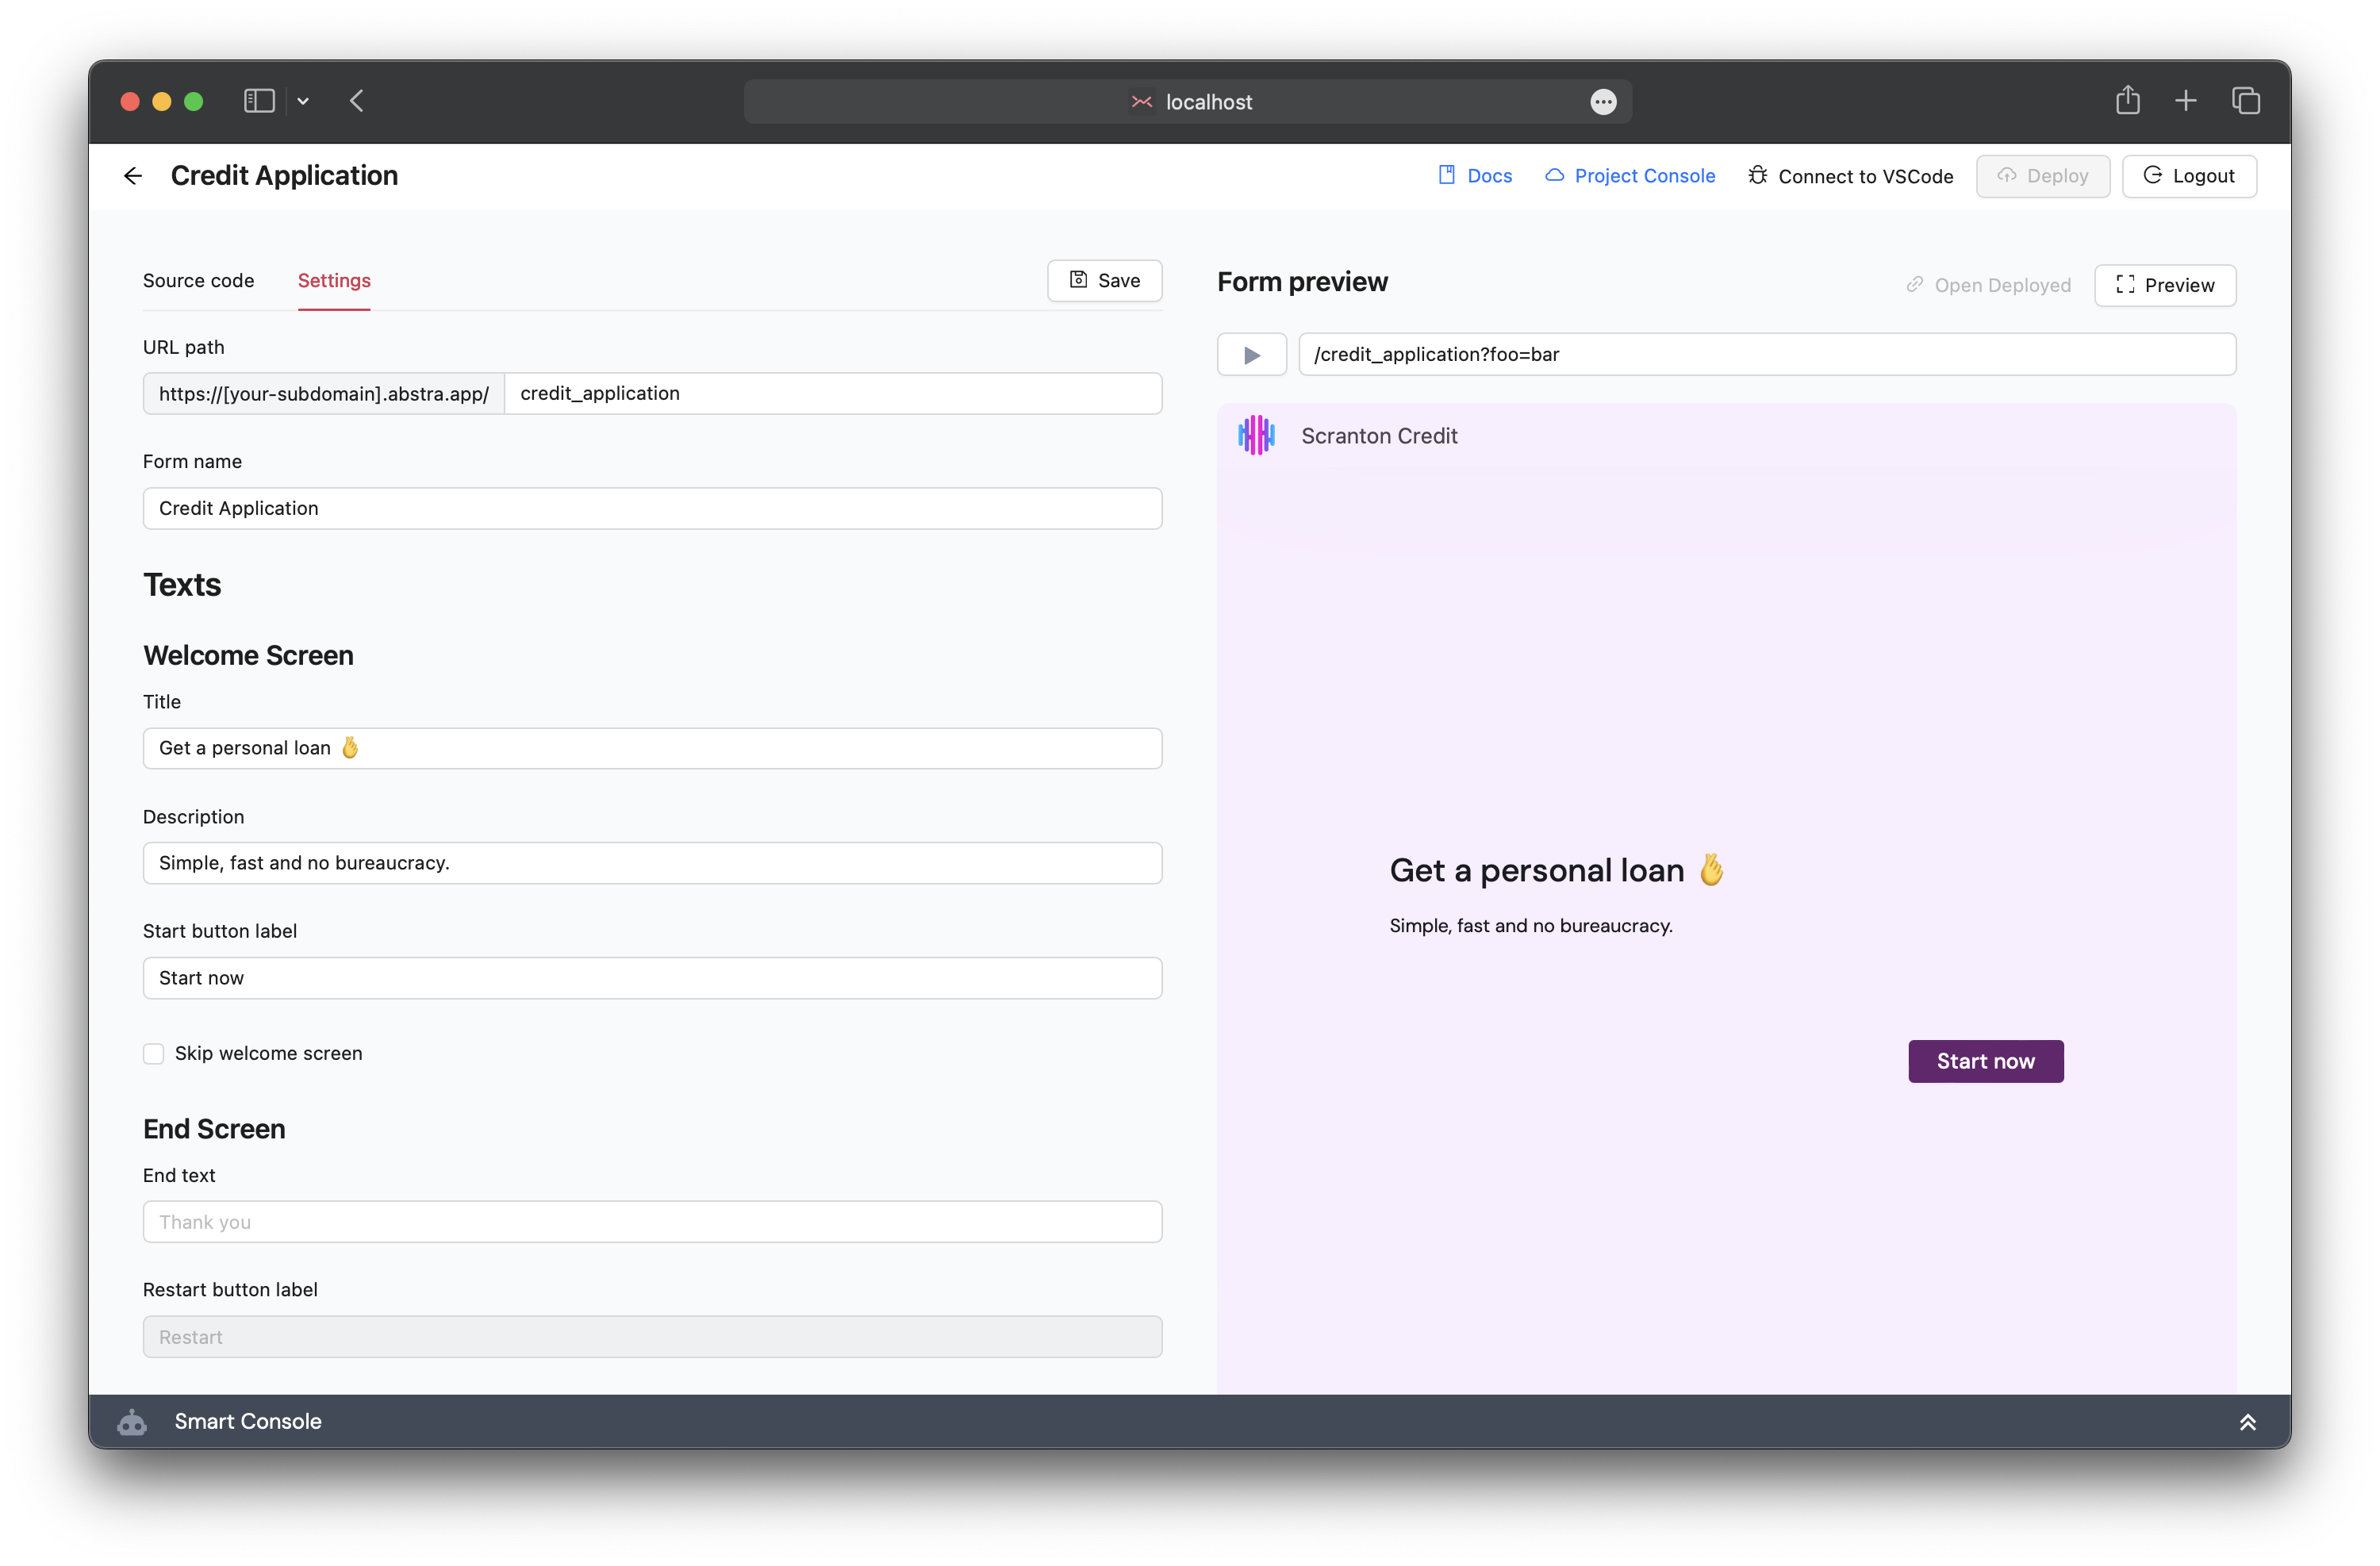
Here is a rundown of each setting:
URL path
Configure the URL path where your users will access your Form on the web.
Form name
This is the name of your Form inside the local editor. It will not be shown to users.
Welcome Screen
In the following fields, you will configure the Form's first screen, that users will see when they open up the URL.
Title
Configure the title of the Form that you want users to see.
Description
Add a short description of the Form.
Start button label
Configure what the Form's Start button label will say. Defaults to "Start".
Skip welcome screen
Here you can choose to skip the Welcome screen. If you do, when a user accesses the Form's URL, it will start executing immediately and open up your first widget.
End Screen
In the following fields, you will configure the Form's final screen, that users will see after they've finish filling out the Form.
End text
Add the message you'd like users to see after completing the Form.
Restart button label
If you'd like users to be able to fill the Form again, add the Restart button label here. Defaults to "Restart".
Show restart button at the end
Here you can choose to add the Restart Form option.
Alert Messages
Error message
Add the message users will see if they encounter an error during the Form's execution. It can ask them to contact the Form's owner, for example.
Use with URL params
URL parameters are a useful way to send information to a Form to support registering key user data and pre-filling fields.
They work like hidden fields, which can be used to customize your Form with information you already know when you’re sharing it with users. Some examples are:
- Pre-filling fields with the user's id
- Recording the referring URL via a utm_source parameter (e.g. Linkedin, Google, Instagram, etc.)
You can configure URL params in your Form's code. Learn more on how to implement here.